GEOINFORMATION PRODUCTS
| ENVIRONMENTAL INFORMATICS GEOINFORMATION PRODUCTS |
BROCKMANN CONSULT | |
| BEAM Java Tutorial | ||
| INDEX| SET-UP| EX 1| EX 2| EX 3a| EX 3b| EX 4| OUTLOOK |
How to open a data product and access some of its properties
This lesson is also about
First we will create a new Java package org.esa.beam.basics for our basic exercise source code. In the
IDEA Project pane expand the module node JavaBeamWS. Right click the source code directory
src and select New and then Package in order to create a new Java package.

Enter the package name in the New Package dialog. Note that we can choose
any package name for our tutorial code, e.g. also beam3.tutorial would be fine.
I've used org.esa.beam.basics for no special reason:

A new package is created and an according directory hierarchy created in our source directory. We now are going to create a main class for our first exercise. Right-click the new package org.esa.beam.basics in the src folder and select New and then Class in order to create a new Java class.

Enter the class name Ex1 in the New Class dialog:

The new class is created and its source code file Ex1.java is automatically opened in the editor.
We now want to create the main method for our Ex1 class so that we have an entry point
for the program. If you know the signature of this method, simply type it in. But there is a faster way in IDEA to
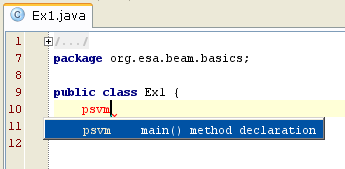
do that: In the editor type psvm and press Tab. psvm is name of the IDEA life
template for generating the main method, Tab invokes such life templates. If you alternatively
press Ctrl+J the IDE will open a suggestion list with the applicable life templates in the current
context:
We now fill the body of the main method. Type ProductIO and again mind IDE's Import
Assistant poping up. Press Alt+Enter in order to import the BEAM class ProductIO:

ProductIO is BEAM's central helper class for data product I/O. It offers a set of static methods
for accessing product readers and writers and reading and writing of data products.
By adding a dot to ProductIO the IDE displays a suggestion list of all offered public members of the
class.
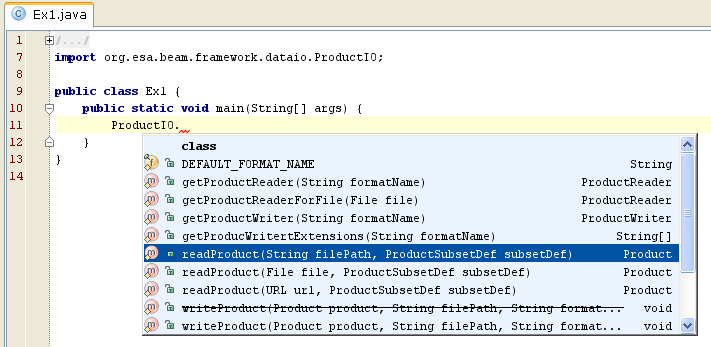
We will use the static readProduct method to read a product. This method is the preferred way in BEAM
to read data products of all file formats supported by BEAM.
We now add the missing method parameters.
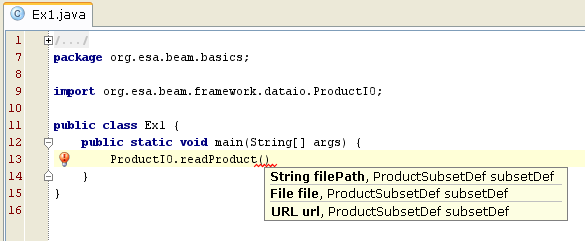
Click Ctrl+P with the caret within the method's brackets. The parameter
preview pops up and tells us that the first parameter is the product file,
either passed in as a String, File or URL object and the second
a ProductSubsetDef object. We are going to use the String variant.
The second parameter ProductSubsetDef may be null, and since we currently know nothing about
it, we provide null for it.
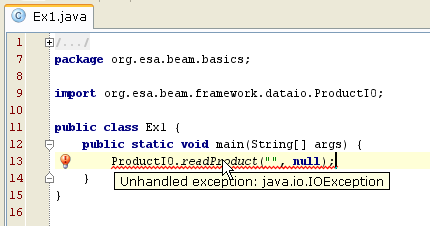
We now notice a curly, red line under the readProduct method call. This is a compiler error
which wants us to handle the IOException which can be thrown by the readProduct
method. We'll add an error handler a few steps later.
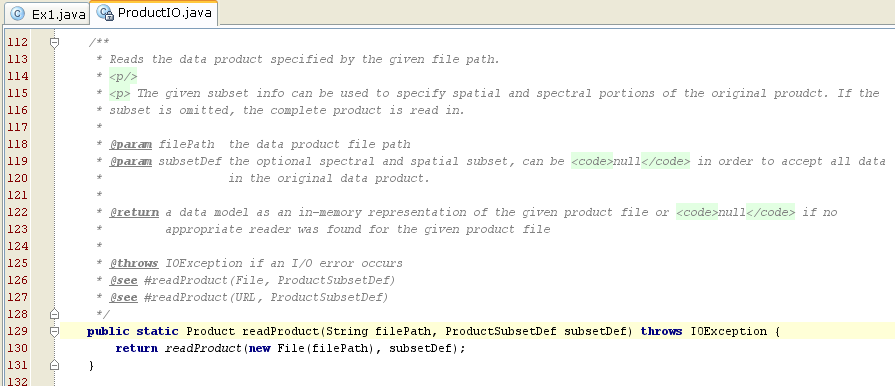
In order to find out more about the ProductIO.readProduct method, locate the caret on it and
press Ctrl+Q which will pop-up the Java API documentation for the selected element.
(Shift+F1 opens the API documentation in the default browser):

Ctrl+B brings you to the BEAM source code where ProductIO.readProduct is defined.
will throw an IOException and thus not return normally.
Ctrl+Alt+LeftArrow will bring us back to the last edit location in Ex1.java.
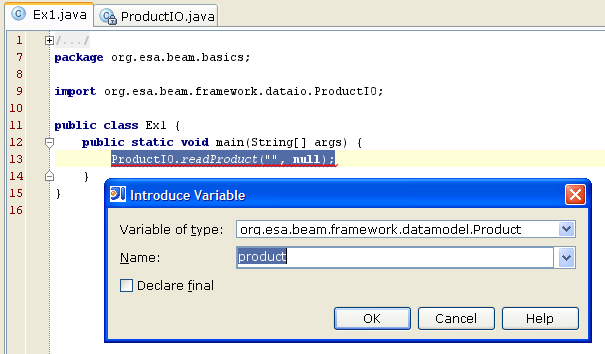
The ProductIO.readProduct returns an object of type Product which is definitely the
core class in the BEAM Java API. We want to assign the product object to a local variable. The IDE can help us
with the Introduce Variable refactoring. We select all we've typed so far in this the current line and press
Ctrl+Alt+V. The Introduce Variable dialog opens. The suggested variable name product is
fine, press OK.
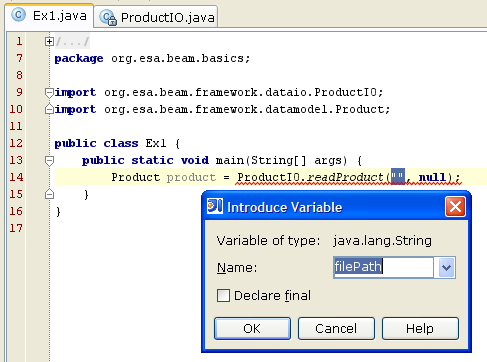
The Introduce Variable refactoring is fun so we try it again with the filePath parameter.
Mark the empty string and press again Ctrl+Alt+V.
We now know that the method either returns an object of type Product or
null. We get null if an appropriate product reader was not found for the file type.
We therefore have to handle the null case. Our naive error handling approach is to print an error
message to the console and simply exit the program with error code 1.

It's time to compile. Goto menu Build and select Make Project or press Ctrl+F9.
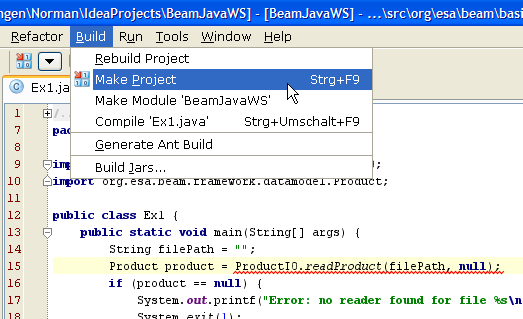
Ok. As promised, the compiler tells us that we have an unhandled exception.

We are now going to fix this. Place the caret on the erroneous code marked with the red, curly underline. Then click on the intention action icon (the yellow light bulb to the left) or press Alt+Enter. Select Surround with try/catch from the suggestion list.

Again, we follow our naive error handling conventionand print an error message to the console and simply exit the program with error code 1.
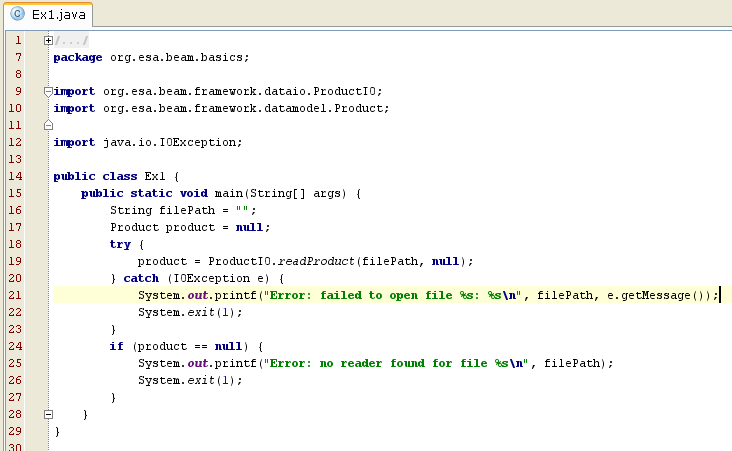
The editor shown no more errors now and Ctrl+F9 (Make) reports no more errors at this time.
We can now try to run the code. Right-click class name Ex1 in the editor.
The context menu pops out. Select Run "Ex1.main()" or press Ctrl+Shift+F10.
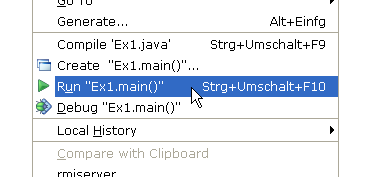
Two things happened in the IDE:
 |
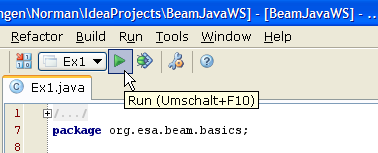 |
Of course! The file path to our data product is not specified.
We have to change the variable filePath so that it points to an existing product file.
In my case it is C:\Data\ENVISAT\MERIS\L1b\MER_RR__1P_TEST.N1
which is the path to a local MERIS Level-1b test data set.
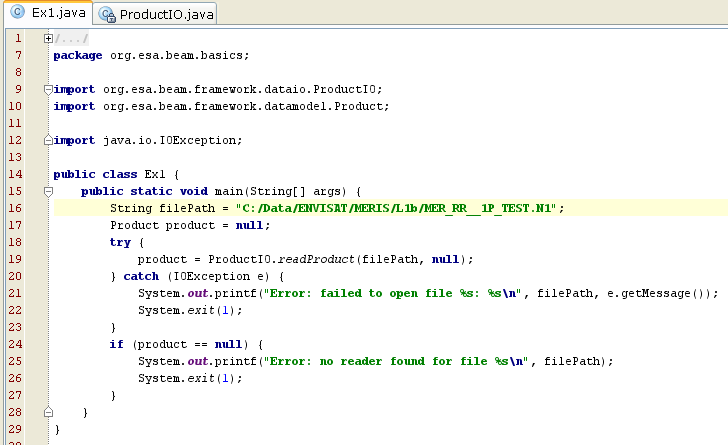
This time the programs runs. Actually we would have expected no output, because we just opened a product, not more. But what we see is a some weird logging output, obiously internal BEAM logging.

The background is that BEAM uses the Java Logging API which by default logs output to the console.
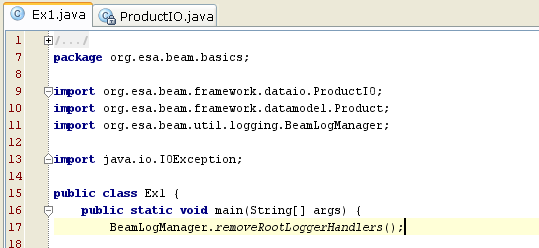
There is a global method BeamLogManager.removeRootLoggerHandlers() which we can use to
disable this behaviour. Running the program again (Ctrl+Shift+F10) shows no more output.
We are now going to access some of a product's properties. Properties in the BEAM Java API are always retrieved
by getter methods, methods whose name start with get followed by the property name.
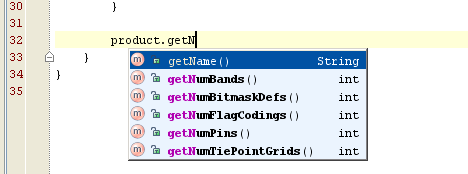
In a new line, type product.get and watch the IDE's suggestion list. Select the getName
method and press Tab.
Use the Introduce Variable refactoring in order to define the local varaible name.
Proceed the same way with a few more properties of a product, e.g. scene raster width,
height and sensing start time. We then print the property values to the console.
Note that we finally invoke the dispose method on product in order to close the underlying
I/O streams and to release resources allocated for the product object. After disposing a product object, it is
in an undefined state and cannot be used anymore by the program.
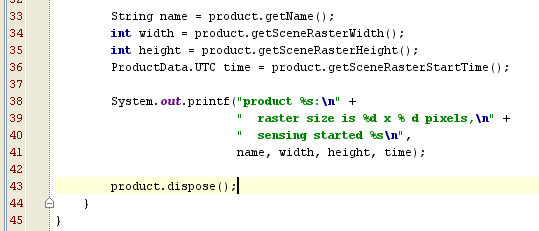
Running the program (Ctrl+Shift+F10) produces the expected results.

When we review our source code, we recognise that error handling of the ProductIO.readProduct covers
most of our code. Furthermore we want to be able to reuse this code in the next exercise without having the need to
copy it. Duplicated code is a bad code smell, which we want to avoid because it is a common source for
errors.
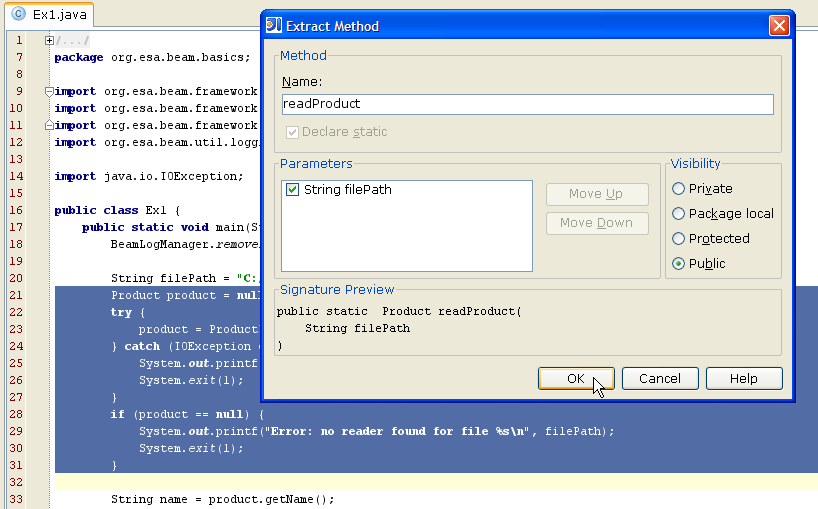
We are going to apply the Extract Method refactoring to the reusable code block. Simply select the
lines in the editor and press Ctrl+Alt+M. The Extract Method dialog opens. We name the new method
readProduct and make it public:
We find another bad code smell Hardcoded File Path. We should pass the file path as a program parameter
into the program instead of decalring it in the source code. So we replace the file path by the first program
parameter args[0].
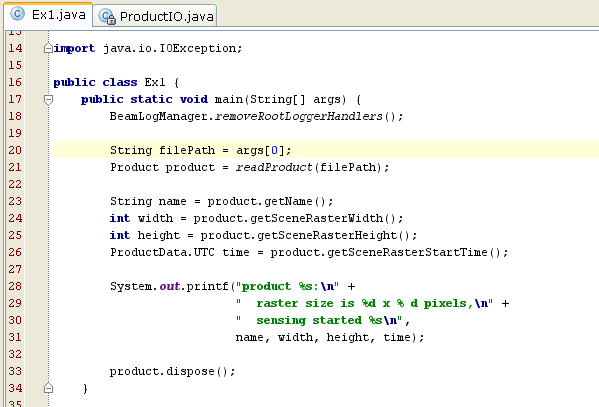
We place the original file path in our run/debug configuration.
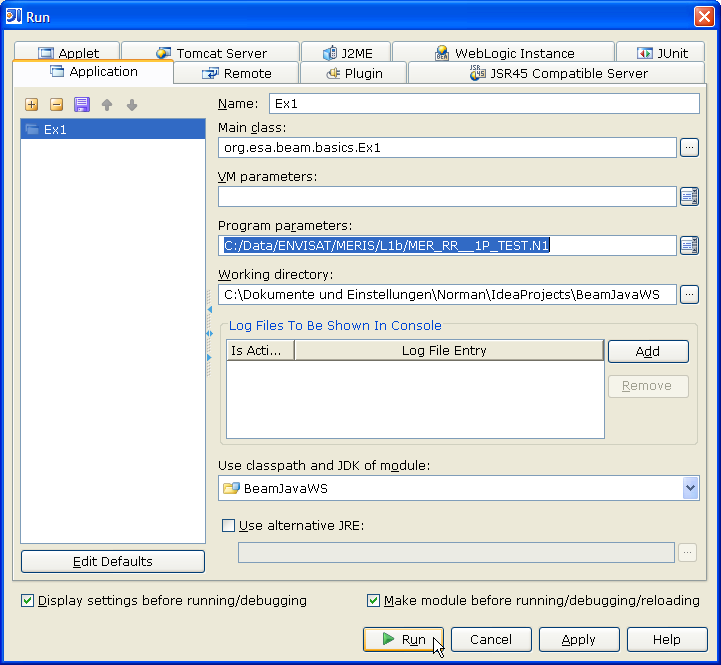
Press the Run button in the IDEA tool bar or Shift+F10 to open
the Run/Debug Configuration dialog.
In the Program parameters text field enter
C:\Data\ENVISAT\MERIS\L1b\MER_RR__1P_TEST.N1, the previous value of the filePath
variable. After pressing Run we get the same result but our program is a bit more flexible this time.
Indeed, the program will function with all remote-sensing formats supported by BEAM.
Until this point, we've used the IDE to run the program. We want also to be able to run our program from the command line. We are going to write a script file for it now. We do this for a Windows PC, but for Unix scripts it is the same story.
Right-click the src folder in the Project pane and select New followed by File.
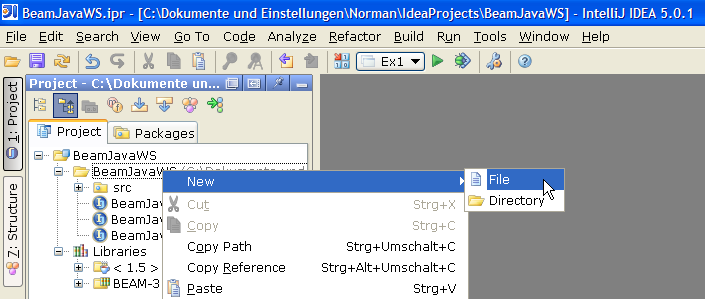
Enter Ex1.bat as filename in the New File dialog.

The following, hopefully self-explaining, script code will run our program after a
few changes. You have to adapt the JAVA_HOME and BEAM_HOME variables to your local
computer.

We are then able to run our program from the command-line window:

Excercise 1 is herewith complete so that we now can head over to Exercise 2.
© 2005 by Brockmann Consult - Need help? Contact beam@brockmann-consult.de